Create Connected App
info
Plinqx uses this Connected Application to securely interact with the Salesforce platform APIs, ensuring that we follow best practices.
It enables Plinqx to deploy API-related changes, specifically those published from the Management Console and Designer, while also facilitating outbound API call visibility within the Management Console tab. This ensures a seamless and secure interaction between Plinqx and Salesforce for managing API configurations and operations.
Step 1: Retrieve the Callback URL from the Plinqx Auth Provider
Before creating the Connected App, you need to get the Callback URL from the Plinqx Auth Provider.
- Navigate to Setup in Salesforce.
- In the Quick Find box, search for and select Auth Providers.
- Find and open the Plinqx Auth Provider.
- Locate the Callback URL and copy it. You will need this when setting up the Connected App.
Step 2: Create the Plinqx Admin Connected App
- Go to Setup in Salesforce.
- In the Quick Find box, search for and select App Manager.
- Click New Connected App (top-right corner).
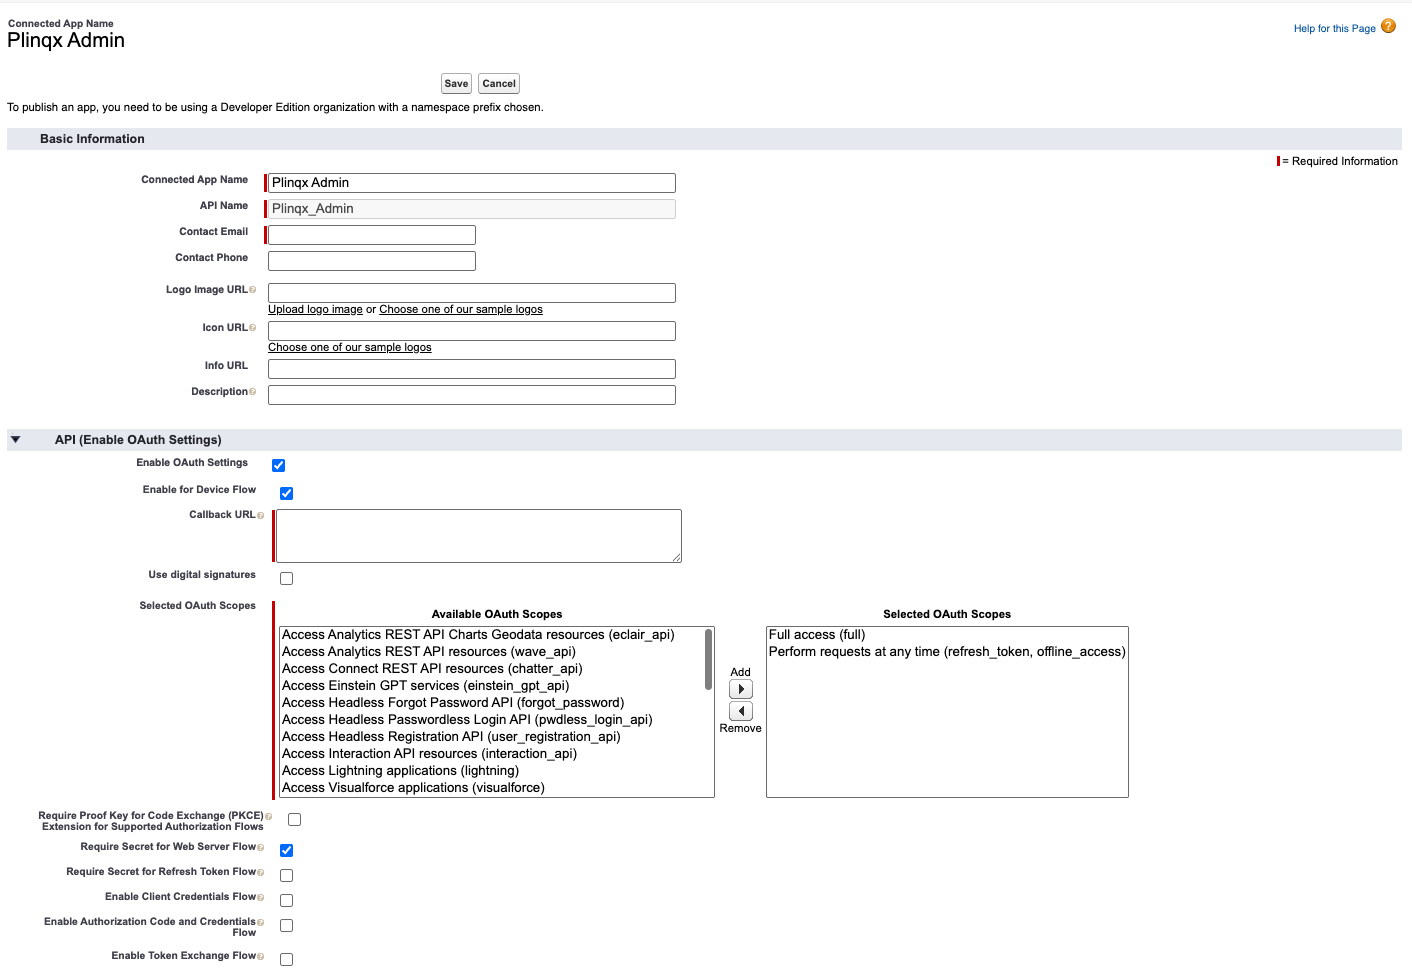
Step 3: Configure the Basic Information
- Enter the following details:
- Connected App Name:
Plinqx Admin - API Name:
Plinqx_Admin - Contact Email: Enter a valid email address.
- Connected App Name:
Step 4: Enable OAuth Settings
- Scroll down to the API (Enable OAuth Settings) section.
- Check Enable OAuth Settings.
Step 5: Enable Device Flow
- Under OAuth Settings, check Enable for Device Flow.
Step 6: Enter the Callback URL
- In the Callback URL field, paste the Callback URL copied from the Plinqx Auth Provider.
Step 7: Configure OAuth Scopes
- Under Available OAuth Scopes, select and move the following to Selected OAuth Scopes:
- Full access (full)
- Perform requests on your behalf at any time (refresh_token, offline_access)
Step 8: Enable Secret for Web Server Flow
- Scroll down to Require Secret for Web Server Flow.
- Check the box to enable this setting.
Step 9: Save the Connected App
- Click Save.
- Salesforce will take some time to process the request. You may need to wait up to 10 minutes before the app becomes available.
Step 10: Retrieve the Consumer Key and Secret
- Once the Connected App is created, go back to App Manager.
- Find Plinqx Admin in the list.
- Click View next to the app.
- Once in the App click the Manage Consumer Details button.
- Enter the Verification Code that was emailed to you, then click Verify
- Copy the Consumer Key and Consumer Secret—these will be required for the Plinqx Auth Provider in Step 1 above.